Tag: hosting

  • Free website hosting #4 – AWS

    Free website hosting #4 – AWS

    This is the final part of a four part series looking at free hosting from modern cloud providers:

    In this article we look at the offering from Amazon web services, and the static hosting capabilities of the S3 storage bucket.

    If this AWS S3 storage free? Well, mostly.

    As part of the AWS Free Usage Tier, you can get started with Amazon S3 for free. Upon sign-up, new AWS customers receive 5GB of Amazon S3 storage in the S3 Standard storage class, 20,000 GET Requests, 2,000 PUT Requests, and 15GB of Data Transfer Out each month for one year.

    https://aws.amazon.com/s3/pricing/

    Step 1 – login or create an AWS account

    If you have an AWS account then sign in to the console, otherwise sign up for the 12 month free trial.

    Step 2 – create an S3 bucket

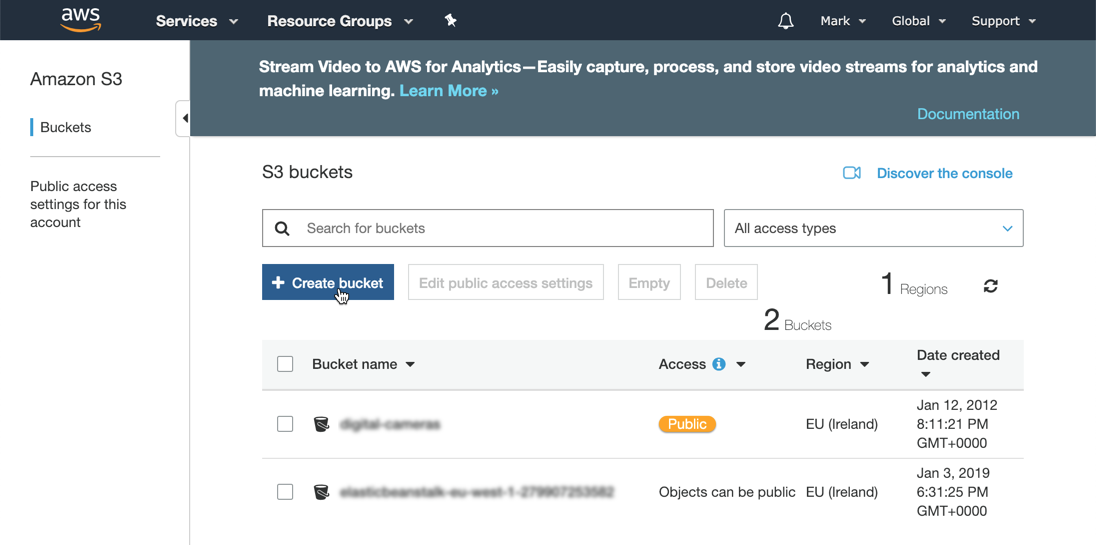
    • Enter a bucket name, select a region and copy settings from an existing bucket if needed.
    • Click Next through steps 2 and 3 and then Create bucket again on step 4 and the new storage bucket will be created.

    Step 3 – upload files

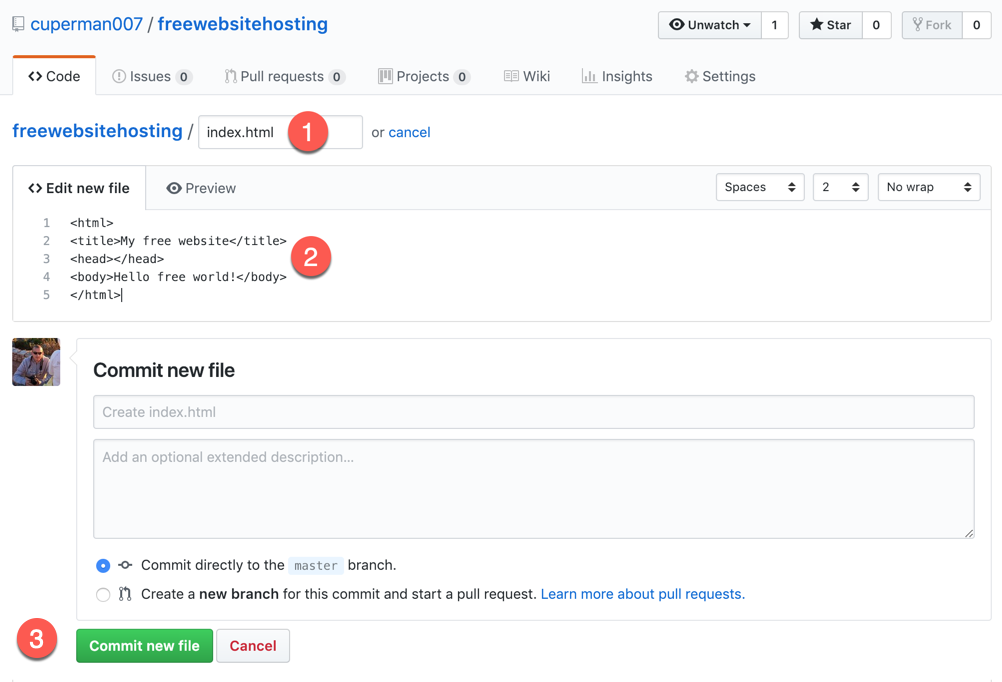
    Upload the standard index.html file using the onscreen picker and selecting the default options.

    • On the properties tab select Static website hosting and select the option Use this bucket to host a website, and enter index.html in the index document field. Click Save to complete the change.

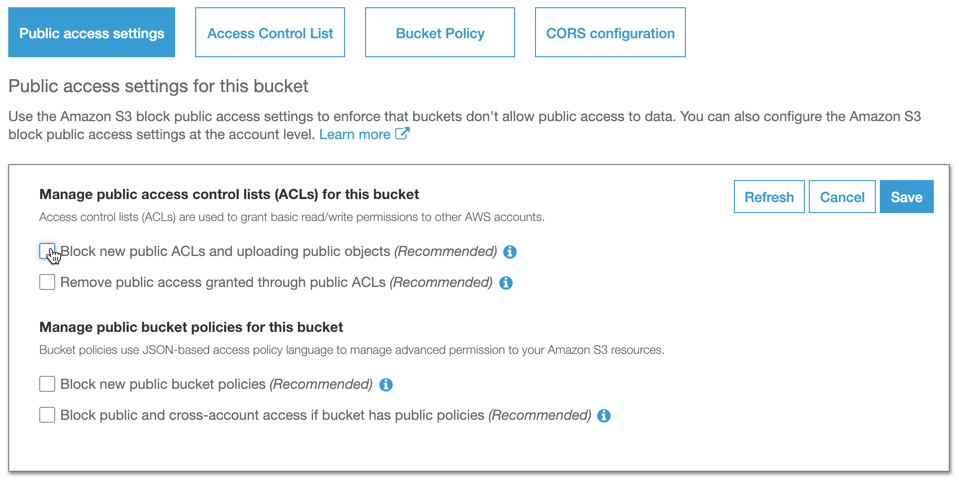
    Step 4 – set permissions

    On the permission tab remove the restrictions on public access and click Save to commit the changes.

    • On the bucket policy tab, enter the following policy to enable permission for unauthenticated users to access the files:

    {
    “Id”: “Policy1546543764975”,
    “Version”: “2012-10-17”,
    “Statement”: [
    {
    “Sid”: “Stmt1546543763921”,
    “Action”: [
    “s3:GetObject”
    ],
    “Effect”: “Allow”,
    “Resource”: “arn:aws:s3:::my-free-website/“, “Principal”: “
    }
    ]
    }

    • This policy syntax can be also be generated using the policy generator tool
    • Once the permission has been granted, a notification will be displayed
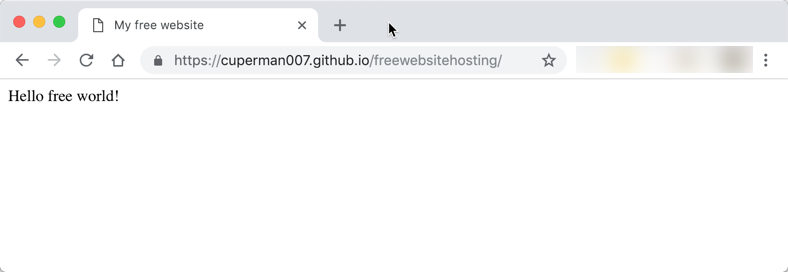
    • From the static hosting page click the link to view the hosted website

    Summary

    A simple a straight forward process, bit again no native source control from Git. AWS does offer CodeDeploy but you need to setup up resource groups, security groups and a Lamba pipeline to get this working. Compared to other offerings this feels like a big effort.

  • Free website hosting #3 – Firebase

    Free website hosting #3 – Firebase

    This is part 3 of a series detailing the steps required to obtain free hosting on a modern cloud provider.

    In this part we take a look at Google Firebase. The documentation for this process is already really good, so this document will just be a summary.

    Step 1 – Login or create a Google account

    If you have a Google login, you can use it, or create a new one.

    Step 2 – create a project

    Within Firebase all related resources are contained within a project, so this must be created first.

    • Click Add project
    • Enter a unique Project name – this must be unique to your login. If the name is also unique within Firebase the Project ID will match the Project name, otherwise a suffix will be automatically added.
    • Check the boxes, and click Create project

    Step 3 – create a hosting resource

    Within the application a hosting resource is created.

    • Within the project select Hosting | Get started
    Roll your sleeves up… you need to open a console…

    This is where you need to roll your sleeves up. Your Firebase web application is mostly controlled via a Command Line Interface (CLI). You need to use NPM, which which should be automatically installed with Node.js

    Open a command line (windows) or terminal window (mac) in a suitable folder and use the CLI to create your Firebase hosting resource. Copy the install command from the browser and paste it into the CLI and hit Enter.

    NOTE: you will need Admin or sudo permissions to complete this.

    • npm install -g firebase-tools
    • firebase login
    • firebase init
    • firebase deploy

    You should now have a working demo website.

    The default webpage that is created during firebase init

    To make sure this is the correct content, you must now copy all the files and folders from your website into the public folder and run firebase deploy again.

    Hello free world!

    Summary

    IMHO Firebase has the best documentation that I’ve seen, and if you are comfortable with the CLI then it’s all pretty straight forward. However, if you are not at home in the terminal, then the CLI will be very intimidating to most non-developers.

    There isn’t yet a built in story for deploying from source either, which I think is a mistake on the part of the Google team. Git is so ubiquitous now that this should be available by default. Deploying via a repository also enforces development “best-practices” such as source control and CI.

    There is an excellent Firecast on how to deploy via Travis CI, but adding another dependency into the mix doesn’t sit well with me – it is adding unnecessary sprawl and complexity.

  • Free website hosting #2 – Azure Web Apps

    Free website hosting #2 – Azure Web Apps

    In the second part of this series we take a look at the first free web hosting option in Azure – Wep Apps.

    Azure comes with a free hosting tier. This is limited to 1GB and on shared infrastructure, so won’t suit a website needing high performance, however for free hosting this is to be expected.

    In this example we’re going to use the same GitHub repo and webpage created in part-1.

    Step 1: Create an account or login

    If you have an Azure account you can login to the Azure portal using your Microsoft login credentials.

    TIP: Learn more about accounts, subscriptions and logins.

    To create a free account navigate to https://azure.microsoft.com/en-gb/free/ click the Start for free button, and follow the instructions.

    Step 2: Create a web app

    Once you have logged into the portal;

    1. Select Create a resource | Web | Web App
    2. Complete the fields
      1. App name must be unique within the AzureWebsites domain, not just your account. A red message will appear if this is not correct.
      2. Choose the subscription where you want the resource saved.
      3. You are going to host a static website, so you can use Windows or Linux
      4. Publish should be set to Code

    Step 2b: Create a free service plan

    This is the important bit: the App service plan must be F1 (free).

    1. Select App Service plan | Create new
    2. Enter an App Service plan name and select a suitable location.
    3. Click Pricing tier, then under the Dev/Test tab select F1 then click Apply
    4. Click OK to create the new App Service plan.
    5. Click Create to create the web app

    To find your new website, click on Home. The website should be at the top of your recent resources list.

    Step 3: Add auto-deployment from Git

    This step will work from any Git repository, not just GitHub. However GitHub and Azure are both managed by Microsoft, so this feels like a sensible choice.

    • Open the website blade then select Deployment Center
    • On the first page (1 – Source Control) a list of available source options are available. Subsequent steps will reflect the choice made here. We’ll use the same source code from part 1, so select GitHub. You will need to authorise your subscription to access GitHub if you have not already done so.
    • Click Continue
    • Step 2 (Build Provider), select App Service Kudu build server
    • Step 3 (Configure) select the suitable Organisation, Repository and Branch names.
    • Step 4 (Summary), click Continue and the deployment will start.
    Toast notifications during deployment
    • Once complete a message will be displayed.
    Status update after deployment
    • The website can be access by typing the URL, or from the resource home page Browse button.

    Browse with the URL or the link

    Done!

    Hello free world!

    Summary

    In summary this approach is no-where near as easy as the steps in part-1. It’s not to say that this is difficult, just that GitHub pages is so simple. Most of the complexity for this site is in the creation of resource groups – and this can be confusing for beginners.

    Also, the evolution of the Azure Cloud is moving at such an incredibly fast pace, it can be intimidating or daunting for developers to step in. Fears of features being here-today and gone-tomorrow are quite real – although websites feel pretty safe.

    That said, free sites within an Azure website offer far more than just static website hosting. Within this same application you can also host an application with server-side code support (ASP.NET, PHP etc).

    Next up – Part 3 – Firebase

  • Free website hosting #1 – GitHub Pages

    Free website hosting #1 – GitHub Pages

    There are a number of ways to get free website hosting in a no-nonsense, no adverts way. In this series of posts I’m going to take a look at a few.

    I’m only considering systems that can offer hosting for static websites. No server side programming languages (PHP, Python or ASP.NET), just HTML, CSS and JavaScript.

    First up, is GitHub Pages

    Just edit, push, and your changes are live.

    – GitHub

    A lofty promise, is it that easy?

    Getting started

    Step 1: Login or create an account

    Firstly you will need a GitHub account. If you don’t already have one, you can join for free: https://github.com/join.

    Step 2: Create a new repository

    • Select Repositories and then New
    • Enter a Repository name and description
    • Select Inititialize this respository with a README (always document!!)
    • Click Create repository

    Step 2: Create an index file

    • Click Create new file
    • Enter index.html as a file name
    • Enter some simple HTML
    • Click Commit new file

    Step 3: Change settings

    • Select Settings
    • Scroll down to GitHub pages section
    • Select master branch and click Save
    • When the page refreshes scroll down and the website URL will be displayed
    • Just click the link to open your free website

    Summary

    In summary this is a very straight-forward way of creating a static website. A static website can contain web pages, CSS files, images and JavaScript (including calling dynamic services). A static site cannot contain any code that needs to be processed by a web server (e.g. PHP, ASP, Python etc).

    Static sites can be very simple, or very complex, and there are a number of great quality site generators that can be used in conjunction with GitHub Pages, for example Jekyll or MkDocs.

    GitHub pages also supports dynamic mapping of a custom domain name without charge.

    Next up – Part 2 – Azure Web Apps